Marshmallows Blooming Roses: An Amazing Ultimate Silicone Mold Recipe
Marshmallows Blooming Roses, crafted using a delightful silicone mold, are a beautiful addition to any dessert. This innovative and charming recipe combines both flavor and aesthetics, creating a confection that’s as delicious as it is stunning. Imagine presenting a platter of these sweet, rose-shaped marshmallows at your next gathering. Their vibrant colors and intricate designs are sure to wow your guests and leave them wanting more.
These marshmallows are not only a treat for the taste buds but also bring a touch of artistry to your culinary creations. If you’ve ever wanted to indulge in a unique, homemade treat that impresses visually and flavor-wise, the Marshmallows Blooming Roses will satisfy your cravings. This guide will navigate you through crafting these delightful confections, highlighting the steps, ingredients, and tips to ensure your success. Whether you’re planning a special celebration or looking for a creative way to enjoy marshmallows, get ready to unleash your inner chocolatier!
Each time you serve these Marshmallows Blooming Roses, you’ll be met with smiles and oohs and aahs. The fascinating process of transforming basic ingredients into edible roses is incredibly rewarding. From their fluffy texture to the sweet taste, every bite is a reminder of why homemade treats are superior. So, gather your tools and let’s dive into the amazing world of creating these ultimate marshmallow roses!
Why You’ll Love This Recipe
The Marshmallows Blooming Roses recipe is not just another dessert; it’s an experience. Here’s why you will absolutely adore this creation:
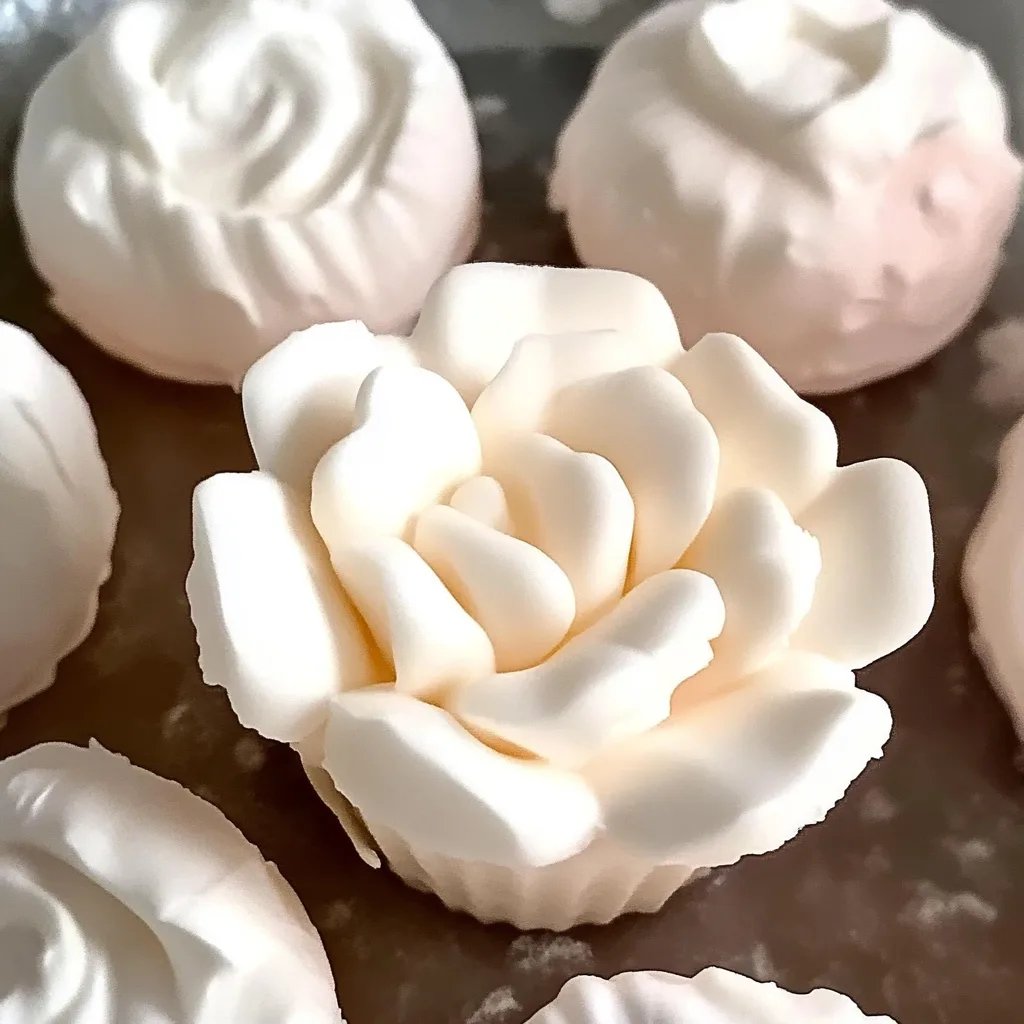
1. Visual Appeal: Each marshmallow is shaped like a rose, adding a stunning touch to any dessert platter.
2. Easy to Make: The recipe is straightforward, making it accessible for both beginners and seasoned cooks.
3. Customization: You can easily customize the colors and flavors to match any theme or occasion.
4. Fun to Create: Working with silicone molds adds an element of fun to your baking process.
5. Versatile Uses: These marshmallows are perfect for decorating cakes, serving at parties, or simply enjoying with hot cocoa.
6. Flavorful Treat: Despite their beautiful appearance, the tasting experience is equally delightful, with a sweet and fluffy texture.
Understanding these aspects will emphasize why making Marshmallows Blooming Roses is an essential addition to your recipe collection! Each component comes together to create a beautiful and tasty treat that will leave everyone delighted.
Preparation and Cooking Time
Creating your Marshmallows Blooming Roses will require some time and care. Here’s a quick breakdown of what to expect:
– Preparation Time: 30 minutes
– Chill Time: 3 to 4 hours (for the marshmallows to set properly)
– Total Time: Approximately 4 hours and 30 minutes
These times can vary, particularly with the chilling phase, but this guideline provides a solid framework for your marshmallow-making adventure.
Ingredients
– 2 cups granulated sugar
– 1 cup light corn syrup
– 1 cup water
– 2 tablespoons unflavored gelatin
– 2 teaspoons vanilla extract
– Food coloring (various colors for roses)
– Powdered sugar (for dusting)
Step-by-Step Instructions
Creating Marshmallows Blooming Roses is a fun and satisfying process. Follow these steps for best results:
1. Prepare the Mold: Lightly dust your silicone mold with powdered sugar and set it aside.
2. Mix Gelatin: In a small bowl, combine the unflavored gelatin with ½ cup of cold water. Let it sit to bloom for about 5-10 minutes.
3. Cook the Syrup: In a saucepan, combine the granulated sugar, corn syrup, and ½ cup of water. Cook over medium heat until the sugar has dissolved, then increase the heat and bring to a boil.
4. Candy Thermometer: Attach a candy thermometer to the saucepan. Boil without stirring until the syrup reaches 240°F (115°C).
5. Whip the Mixture: Once your syrup reaches the desired temperature, remove it from heat.
– While the syrup is boiling, start whipping the bloomed gelatin in a stand mixer.
6. Combine: Slowly pour the hot syrup into the gelatin while mixing on low speed. Gradually increase the speed to high and whip until the mixture is thick and fluffy, about 10-12 minutes.
7. Flavor and Color: Add the vanilla extract and desired food coloring. Mix until everything is evenly distributed.
8. Transfer to Mold: Carefully pour the marshmallow mixture into the prepared silicone mold, using a spatula to smooth the top.
9. Set: Allow the marshmallows to set at room temperature for 3-4 hours or until they are firm.
10. Remove and Dust: Once set, carefully remove the marshmallows from the mold and dust them with powdered sugar to prevent sticking.
These steps will guide you in creating stunning Marshmallows Blooming Roses that are not only perfect in design but delightful in taste.
How to Serve
Serving your Marshmallows Blooming Roses can be just as enjoyable as making them. Consider these ideas for an unforgettable presentation:
1. Dessert Platters: Arrange the marshmallows on a decorative cake stand or platter, showcasing their beautiful shapes.
2. Cupcake Toppers: Use them as vibrant toppers on cupcakes for added flair.
3. Hot Chocolate Addition: Serve them alongside mugs of rich hot chocolate, allowing guests to add a floral touch to their drinks.
4. Gift Packaging: Place them in clear gift bags tied with a ribbon for a charming homemade gift.
5. Themed Parties: Use color schemes for themed parties, making the marshmallows fit perfectly with your decor.
By paying attention to presentation, you maximize the enjoyment and beauty of these delightful treats. Your guests will be impressed not just by their appearance but also by the delicious flavors of your homemade marshmallows!
Additional Tips
– Work in a Cool Environment: Marshmallows can get sticky if the temperature is warm. A cool kitchen helps them hold shape better.
– Use High-Quality Flavors: The flavor of your vanilla extract can influence the final taste. Use pure vanilla extract for the best results.
– Experiment with Colors: Go wild with food coloring! Create an ombre effect by layering different colors in the mold.
– Use a Sifter: Dusting your molds with powdered sugar can be more effective if you sift the sugar first to avoid clumps.
– Test Texture: Before pouring into molds, test the marshmallow mixture. It should be thick but not too stiff.
Recipe Variation
Feel free to get creative with your Marshmallows Blooming Roses! Here are some fun variations to try:
1. Flavored Marshmallows: Add different extracts like almond, mint, or lemon to change the flavor profile.
2. Chocolate-Dipped: After setting, dip the bottoms in melted chocolate for an added richness.
3. Add Sprinkles: Before they set, sprinkle edible glitter or tiny star-shaped sprinkles on top for a festive touch.
4. Fruit-infused Marshmallows: Incorporate fruit puree into the mixture for a natural flavor. Strawberry or raspberry can give a beautiful color too.
5. Mini Rose Marshmallows: Use a smaller mold to create bite-sized rose-shaped marshmallows that are perfect for party favors.
Freezing and Storage
– Storage: Keep your Marshmallows Blooming Roses in an airtight container at room temperature for up to two weeks.
– Freezing: If you want to store them longer, you can freeze the marshmallows for up to 3 months. Ensure they are well-wrapped in plastic wrap and stored in a freezer-safe container to prevent freezer burn.
– Thawing: When you’re ready to enjoy, simply take them out of the freezer and let them thaw at room temperature for about an hour.
Special Equipment
To create the perfect Marshmallows Blooming Roses, you’ll need some specific tools:
– Silicone Rose Mold: The key to achieving the beautiful shape of your marshmallows.
– Candy Thermometer: Essential for ensuring the syrup reaches the correct temperature.
– Stand Mixer or Hand Mixer: A powerful mixer will help whip the marshmallow mixture to the desired fluffy consistency.
– Spatula: Useful for smoothing the marshmallow mixture in the mold.
– Sifting Tool: For dusting powdered sugar evenly over the molds.
Frequently Asked Questions
What should I do if my marshmallows are too sticky?
If your marshmallows are overly sticky, dust them with more powdered sugar or cornstarch. You can also leave them out to dry for a short time.
Can I make these marshmallows vegan?
You can create a vegan version by using agar-agar instead of gelatin. The texture will be slightly different, but they will still be delicious.
What if I don’t have a silicone mold?
You can use a shallow dish to pour the mixture and cut them into shapes after they’ve set. Just make sure to dust the dish with powdered sugar to avoid sticking.
Are these marshmallows gluten-free?
Yes, marshmallows are naturally gluten-free. However, always check the labels of your ingredients to ensure they don’t have any gluten-containing additives.
Can I flavor the marshmallows with spices?
Absolutely! You can add spices like cinnamon, nutmeg, or cocoa powder to give your marshmallows a unique twist.
Conclusion
Creating Marshmallows Blooming Roses is not only a delightful process but also a rewarding one. These beautifully crafted treats blend sweetness, art, and a touch of creativity, making them perfect for any occasion. By following this guide, you can easily master the art of making stunning marshmallows that will impress your friends and family alike. Enjoy the fun of crafting and the joy of sharing these sweet floral bites!